Categories
bacon Best of Inuyaki David Chang Japanese Momofuku

Bacon Agedashi Tofu

David Chang will be the first to admit that both he and his Momofuku restaurants (Noodle Bar, Ssam, Ko) are overhyped and overexposed. The release of the Momofuku cookbook last month isn’t helping matters much since he’s making the rounds promoting the book around the country, and he’s actually doing book signings in the Bay Area through the weekend. I received the Momofuku cookbook a few days after Thomas Keller’s Ad Hoc at Home, and both books are the only things I’ve been reading since—aside from the Internet, of course. :)

(See EatMeDaily.com for great reviews of both books: Momofuku | Ad Hoc at Home)

Bacon Agedashi TofuBacon Agedashi Tofu, inspired by the Momofuku cookbook.

The first recipe in the Momofuku book that really got my attention was the bacon dashi. In the book, Chang says that when Noodle Bar first opened, he had a hard time finding good katsuobushi (smoked bonito) to make traditional dashi, the seaweed and fish broth that’s the foundation of Japanese cuisine. Chang started looking at other options to replicate the katsuoboshi’s smoky flavor, and good ol’ American bacon was the natural choice. Making the bacon dashi is pretty easy, and the final product looks and tastes like regular dashi but with a hint of smoky bacon flavor. It can be used in any application that calls for a regular dashi, and the first thing I thought of was one of my favorite dishes, agedashi tofu (fried tofu in broth).

For the broth, a.k.a. tentsuyu, I started by warming one cup of bacon dashi in a small sauce pan and added about three tablespoons each of shoyu (soy sauce) and mirin (sweetened rice wine). I did this to taste, but it should be salty and smoky with a hint of sweetness.

Butterfly a block of firm tofu and separate the two halves. Cut the tofu into rectangles and dry them for about 10 minutes on paper towels. Gently dredge the dried tofu in potato starch or cornstarch and fry them in 350F oil until they’re light golden brown. In a separate pan, fry up some finely chopped bacon until crispy. Chop up a stalk or two of green onions and grate some brown onions. Normally, you’d finish off agedashi tofu with grated daikon, but I didn’t have any on hand. Using onions did keep the dish a bit more on the American side and provided a similar texture to what grated daikon would have provided.

To serve, place three pieces of fried tofu in small bowl. Ladle enough sauce into the bowl so that half of the tofu is still exposed. Top with grated onion, chopped green onion and crispy bacon.

Categories
barbecue beef Korean recipes street food

Korean BBQ Tacos

Kalbi Tacos v2.0
Kalbi Taco (actual size at 1440×900 MacBook Pro resolution)

Korean BBQ tacos have been a street food phenomenon since LA’s Kogi BBQ trucks started drawing hundreds of hungry Angelenos to street corners around Southern California. Kogi’s popularity spawned a blatant knock-off, inspired others to start their own mobile food ventures, and compelled other Korean establishments to add Korean tacos to their menus, such as SF’s Seoul on Wheels, Namu, and John’s Snack and Deli, and NY’s Seoul Station). For food bloggers, creating our own version of the dish we don’t have easy access to becomes a fun little project.

Seoul on Wheels - Korean Tacos
Seoul on Wheels’ Korean tacos at Oakland’s Eat Real Fest 2009.

I set out trying to emulate the famous Kogi taco, and this led me in several directions. I focused specifically on kalbi tacos since I’ve always been a big fan of grilled Korean short ribs. In the past, I’ve relied on jarred marinades, but this time I wanted to make one from scratch. I put out a call for recipes on both Twitter and Facebook, and my friend Kevyn came through with an excellent kalbi marinade. Feel free to use your favorite kalbi recipe if you have one.

The question of corn v. flour tortillas doesn’t exist here because tacos should ALWAYS be on corn tortillas, but tortilla size is an important issue. I used 4-inch tortillas because it makes the tacos easy to pick up and eat one handed. However, the smallest tortilla that is carried by most mainstream American supermarkets is 6 inches in diameter, which I generally find too big and unwieldy for taqueria-style or street tacos. If you have Mexican market nearby, 4-inch tortillas shouldn’t be hard to find.

Figuring out the rest of the taco required a lot more research. I started at SteamyKitchen.com and Jaden’s recipe for Korean-style Kogi Tacos, which includes a BBQ sauce recipe developed for her by Kogi Chef Roy Choi. The Kogi BBQ sauce is intended to go with pork or chicken, but I think it works really well to balance out the rest of flavors in the taco. Tasty Eats at Home did her own version of Korean tacos, and I used her cilantro-red onion relish for this recipe. I like the color and flavor that the red onion provides over brown or yellow onions. The last major topping is napa cabbage/romaine slaw dressed with a chili-soy vinaigrette that I lifted from the New York Times.

I ended up making the tacos based on the recipe that follows three times, and by the third time, we pretty much had all the logistics down. I also made some other Korean taco variations a few days ago, and you can see those at the end of the post.

INGREDIENTS AND RECIPES
4-5 pounds of flanken-style short ribs
4-inch corn tortillas, 1 bag (at least 40)

Kalbi Marinade
adapted from a recipe by Kevyn Miyata
(for 4-5 lbs of short ribs)

1½ cups soy sauce
¼ cup sugar
¼ cup honey
¼ cup sesame oil
8-10 cloves of fresh garlic, crushed
6 large green onions, roughly chopped
1 Asian or Korean Pear (½ roughly chopped, ½ sliced then mashed by hand)
Toasted sesame seeds

Combine all ingredients except meat in a bowl and mix well. In a one gallon ZipLoc bag, combine meat and marinade. Let sit for 24-36 hours, flipping over the bag every 12 hours or so to ensure the marinade is distributed evenly.

Kogi BBQ Sauce
adapted from Steamy Kitchen
3 tbsp sugar
2 tbsp gochujang (Korean fermented hot pepper paste)
2 tbsp soy sauce
2 tsp sesame oil
1 tsp rice vinegar
Sriracha to taste (optional)

Whisk together all the ingredients. If desired, add Sriracha a few drops at a time to the sauce until it’s hot enough for ya. :) If you have one, put sauce in a squeeze bottle to make taco assembly more efficient.

Cilantro-Onion Relish
adapted from Tasty Eats at Home
½ red onion, minced
1 tsp rice wine vinegar
1 tbsp cilantro
Juice of 1 lime
Pinch or two of salt

Add onions and rice wine vinegar in a bowl. Allow to sit for about 5-10 minutes. Drain and rinse. Add rest of ingredients to onions and stir to combine.

Napa/Romaine Slaw with Chili-Soy Vinaigrette
dressing recipe from The New York Times
2 cups Napa cabbage, shredded
4 cups Romaine lettuce, shredded
¼ cup soy sauce
2 tsp rice vinegar
1 clove garlic, peeled and minced
2 small jalapenos, seeded and minced
1 tsp minced fresh ginger

Whisk together the soy, vinegar, garlic, jalapenos and ginger and set aside. Combine Napa and Romaine in a bowl until mixed well. You should have a nice green/white color contrast. For best results, divide slaw into batches and dress each batch as needed so that the greens don’t get soggy.

DIRECTIONS

  1. Grill short ribs about a minute per side on a really hot grill.
    Grilling Kalbi
  2. Separate the kalbi meat from the bones and gristle. Cut the meat it into strips lengthwise, then turn 90-degrees and dicing the meat into a “brunoise” of kalbi, if you will. :) If you like the gristle, I’d separate that from the bones and dice it up too. Set the meat aside in a bowl until there’s enough meat to start making tacos en masse.
    Kalbi "brunoise" :P
    Kalbi “brunoise”

    OPTION: After all the meat is diced up, you can either use it straight away or refry it to caramelize the meat so that each piece has a little crunch to it. This extra step is also good if you’re going to use the gristle since it lets it break down a lot more. I’ve done it both ways, and the extra caramelization is really nice.

  3. Heat a lightly oiled cast iron skillet over medium heat. Toast tortillas 30-45 seconds on each side and set aside. Working with a partner or two in an assembly line works great here so tacos can be made right after toasting.
  4. Start assembling the tacos by putting a little meat in the tortilla, then top with a bit of the cilantro-red onion relish, a little slaw, a little more cilantro-onion relish, and then drizzle a little BBQ sauce to finish. We eyeballed all of these amounts, but don’t overstuff the taco or else it will too hard to pick up and eat. You can arrange about eight tacos per plate.
    Kalbi Tacos

VARIATIONS

  • Replace the cilantro-onion relish with a pickled radish/carrot salad (known colloquially as “mu,” if anyone knows what this is actually called in Korean, I’d love to know.) This was my second-favorite version of the taco that we made.
    Bulgogi Tacos 2.0
  • To go even more Korean, I stole an idea from my friend Euge and blended up a jar of kimchi to make a Korean salsa that replaced the Kogi BBQ sauce. I’m not a big kimchi eater, but I liked this a lot. If you like kimchi, this is a great alternative.
    Bulgogi Taco

I’m not sure how many tacos this actually makes because we’ve never had to use all the meat for tacos, and it’s never a bad thing to have extra kalbi around. :) I do know that you can get at least 40 tacos out of 4-5 pounds of meat. You can easily scale this recipe down for your own needs, but I was cooking for parties and needed a lot of food.

Categories
beef recipes sandwiches

The Pastrami Project

Short Rib Pastrami
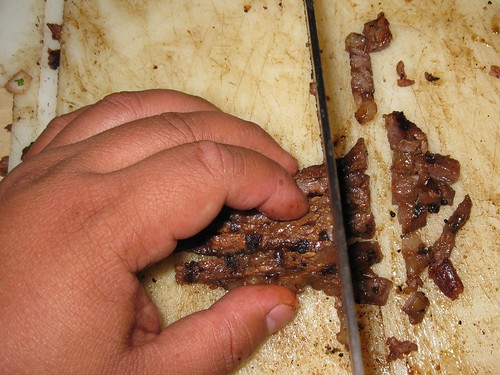
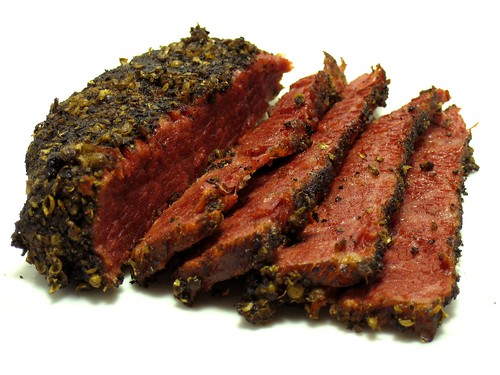
Pastrami made with a short rib slab. (second attempt)

Pastrami is one of my favorite things to eat in the whole world, but it never occurred to me that I could actually make it myself until I read Asian Jewish Deli’s Pastrami Reuben post. What caught my attention was that AJD used a slab of short ribs instead of the more traditional brisket or beef plate that is used to make pastrami, and short ribs are my favorite part of the cow.

Pastrami (brisket)
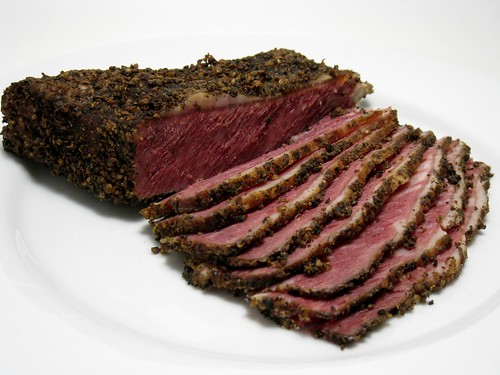
Pastrami made with brisket.

A couple months later, I was reading through Michael Ruhlman’s Ratio and in the chapter on brines, I saw a recipe for corned beef with an additional pastrami variation. I decided I would give that version a shot, especially since the dutch oven bread I made previously from Ratio turned out to really well. Ruhlman recently posted his version of short rib pastrami using regular boneless short ribs, but I kinda took the wind out of his sails a bit when I mentioned AJD’s version to him on Twitter a couple days before it went online.

Pastrami (short rib)
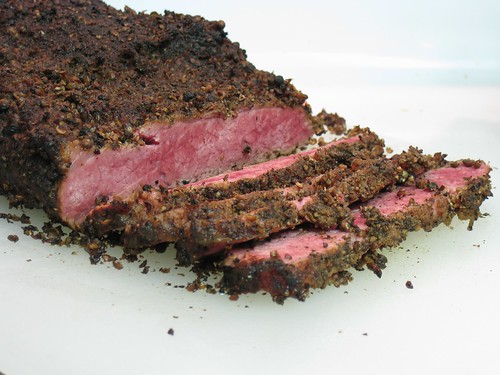
Short rib pastrami made with a standard cut
of boneless short ribs. (first attempt)

The pastrami-making process is broken down into three steps: curing, smoking, and steaming. Curing is basically how you make corned beef. When you smoke and steam corned beef, you get pastrami. In fact, if you bought a prepackaged corned beef at the market, you could easily make this into pastrami, but I’d bet that doing it yourself will yield a better result.

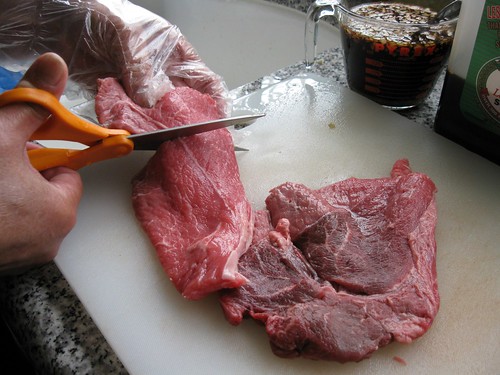
Curing takes four days and is usually done with a wet cure, i.e. brine. Ruhlman prefers brining, especially for larger cuts of meat like a brisket. I also saw some examples on other Web sites where a dry cure didn’t penetrate all the way to the middle of the meat, so I decided to stick with a brine. After brining, the meat is rinsed, dried and then coated on all sides with a ground pepper/coriander rub before it is smoked and steamed.

Pastrami (brisket) sandwich
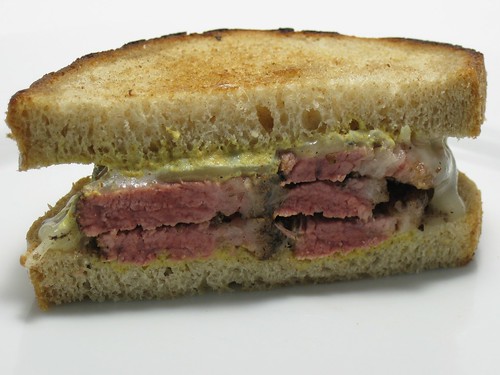
Brisket pastrami sandwich (first attempt).

The first pastrami I made used a brisket point, and it was good, but not as salty as I expected it to be. I also had a couple pieces of boneless short ribs that I threw on the brine, and those smaller pieces of meat were closer to the flavor I was looking for. Upon reviewing the recipe in Ratio, I found a typo in the recipe that affected the ratio of water to salt. I guess I could have figured out the math since tere is a specific ratio for brines, but math was never my strong suit. ;-) I mentioned the discrepancy and verified the correct ratio with Ruhlman via Twitter and proceeded to make a second pastrami a couple weeks later.

Since my goal at the outset was to make short rib pastrami, I set out to find some a slab of short ribs for the second attempt. I found one at Baron’s Meats in Alameda, but if you can’t get your hands on one, you can simply use boneless short ribs since these are easy to find at your market or butcher. Also, since boneless short ribs are smaller, they’re much easier to handle than a short rib slab or an unwieldy brisket.

PASTRAMI RECIPE
adapted from Michael Ruhlman’s Ratio
This version of the recipe corrects the typo in the first edition of Ratio and converts the corned beef recipe into dedicated pastrami variation.

INGREDIENTS
1 4-5 pound brisket, short rib slab, or boneless short ribs.

Brine
2 liters water (half gallon)
25 grams of pink curing salt* (1 ounce or 5 teaspoons)
50 grams sugar (1¼ ounces or scant ¼ cup)
100 grams kosher salt
10 cloves garlic, flattened with the flat side of a knife
1 teaspoon whole black peppercorns
1 teaspoon yellow mustard seeds
1 teaspoon coriander seeds
1 teaspoon dried red pepper flakes
1 teaspoon whole allspice
½ teaspoon ground nutmeg
1 cinnamon stick, crushed or broken into pieces
3 bay leaves, crumbled
1 teaspoon whole cloves
½ teaspoon ground ginger

* The key to preserving pastrami’s familiar red color is using pink curing salt (i.e. sodium nitrite). You can order it online at butcher-packer.com. You can omit it, but the pastrami will be brownish gray instead of red.

Dry Rub
Equal parts ground pepper and ground coriander, preferably freshly ground (enough to cover the meat)

DIRECTIONS
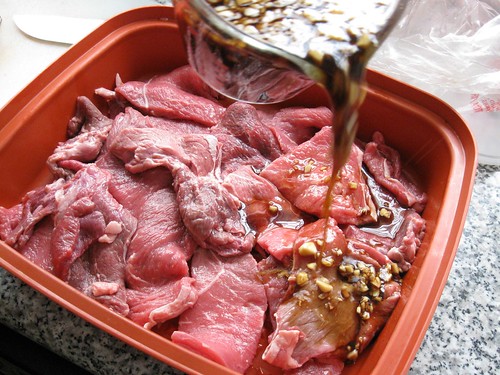
In a pot large enough to hold the entire piece of meat, combine all the brine ingredients in a large pot. Simmer and stir until the salt and sugar are dissolved. Remove from heat and cool to room temperature before refrigerating. When the brine is completely chilled, place the meat in the pot. Use a plate to keep the meat submerged, if necessary. Refrigerate for four days.

Remove the meat from the brine and rinse well. Dry the meat and then cover completely it in the pepper/coriander rub. Smoke the meat until the internal temperature of the meat is 165F. This will take a couple hours or so. After smoking, steam the meat for a couple more hours until tender.

If you’re eating the pastrami right away, you can remove it from the steamer and start slicing it up. If you’re not serving the pastrami right away, you can let it cool and then wrap it up in plastic wrap and refrigerate it. Cooling the pastrami also makes it easier to slice thinly if that’s how you like it. Whether you keep it whole or slice it up, steam the pastrami for 5-10 minutes to warm the meat and give it a bit more moisture before serving.

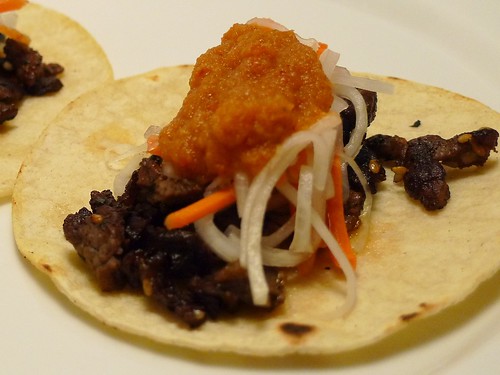
I normally prefer a traditional New York-style sandwich of pastrami on rye bread with brown deli mustard or a pastrami reuben with melted and sauerkraut (as pictured above).
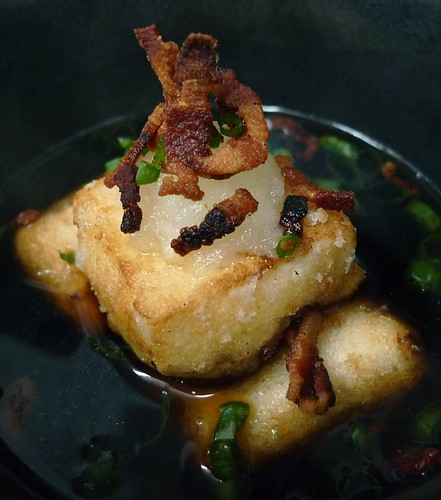
Categories
beef Best of Inuyaki Filipino recipes

Making Tapa with Dad

Ready to broil...

Tapa is Filipino cured beef that is similar to beef jerky, and when I was home last weekend, my dad was raving about the homemade tapa he started making recently. He was eager to show me how it’s done, so I pulled out my camera and followed him step by step.

  1. Dad uses three pounds of thinly sliced sirloin tip steaks that he gets at the local Mexican supermarket and cuts it into equal-sized strips with scissors.
  2. Cut into Strips
  3. Next, he marinates it for 10 hours in a basic mixture of vinegar, soy sauce, garlic and sugar.

    Tapa Marinade
    ½ cup soy sauce
    ½ cup vinegar
    6-8 garlic cloves, chopped
    1 Tbsp. sugar

  4. Marinated for around 10 hours
  5. After marinating, the meat gets layered in a food dehydrator that will run for 12 hours. A dehydrator simplifies the process of making tapa, but if you don’t have one, you can always use Alton Brown’s box fan method, which Burnt Lumpia did when he made his tapa. I don’t have a dehydrator, but I do have a box fan, so I’m going to use this method next time.
    Dehydrate for 12 hours
  6. After 12 hours, the tapa looks like this…
  7. All dried out...
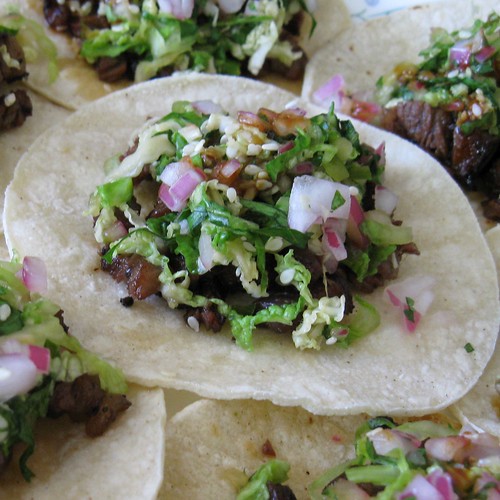
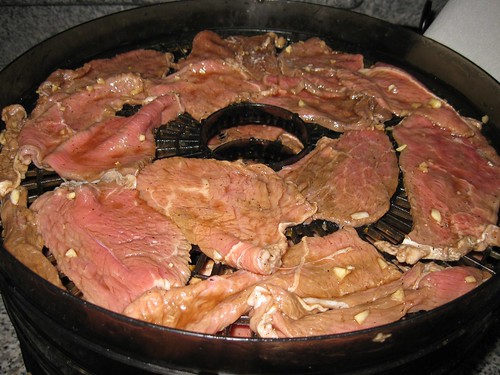
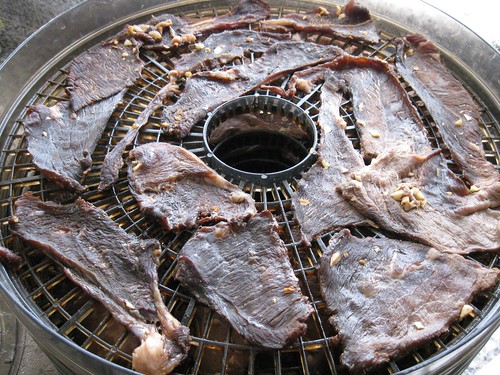
If Lisa Lisa saw this, she’d say it was “all dried out.”
  8. My dad is insistent on broiling the tapa for two minutes a side because I think he’s averse to frying in general, but frying the tapa in a little oil is a great way to finish it off before serving. One of the most popular ways to enjoy it is for breakfast in tapsilog (tapa, garlic fried rice (sinangag) and eggs (itlog)), which is how I like to eat it.
  9. Homemade Tapsilog
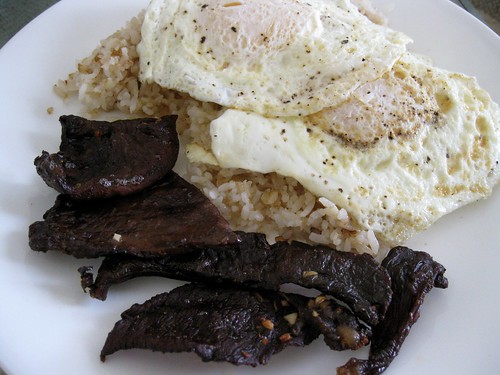
Tapsilog with Dad’s Homemade Tapa.

Last weekend I was home attending my high school reunion, so I’m not going to be home for Father’s Day this year. When I was a kid, it was my dad’s garlic fried rice that woke me up on Sunday mornings, and when I was out on my own, trying to replicate that simple dish was one of the reasons I started cooking. My mom had a stroke five years ago, and dad has been responsible for taking care of her—cooking all the meals, making sure she’s exercising and doing her therapy, and more importantly, keeping her smiling and laughing.

So this post is for you, dad. Happy Father’s Day, and I can’t wait to hear more of your culinary secrets.

Categories
Best of Inuyaki Filipino hot dog recipes

Filipino Spaghetti 2.0 (Holy Trinity Version)

After my first post on Filipino spaghetti, I was pretty satisfied with myself and didn’t really have a desire to make drastic changes to my methods. But during my appearance on Kababayan LA last week, I told host Jannelle So that I had Martin PureFoods red hot dogs in hand and was ready to make a more “authentic” version of Filipino spaghetti. Over the weekend, I dropped by Island Pacific Market in Union City and picked up two more items—a bottle of Jufran banana sauce (ketchup, really) and a blue can of Kraft Cheddar “Cheese” (or as a reader called it…”Krap Chis”)—to complete the Holy Trinity of Filipino Spaghetti.

Holy Trinity of Filipino Spaghetti :)
Categories
breakfast recipes waffles

Crispy Waffle’s Crispy Waffle

I inherited a waffle maker from a friend a few months ago, but the romantic notion of making waffles on weekend mornings ran into a few obstacles, namely finding a good reliable waffle recipe and the motivation to cook after rolling out of bed. Last week, I found both.

Sheryl, a Filipino American ex-pat in the Netherlands, runs a food blog called Crispy Waffle, and her “Easiest, Crispiest, Yeasted Waffles” recipe is a great example of truth in advertising. Instead of baking soda and baking powder, she uses yeast as a leavener and lets the batter rise overnight in the fridge. I followed her recipe exactly and cooked the waffles for around 5 minutes. Here’s what I got:

Crispy Waffle's Crispy Waffle
Categories
Filipino hot dog recipes

Filipino Spaghetti

UPDATE: Check out my Filipino Spaghetti 2.0 post for another version of this dish)

Filipinos love spaghetti…so much so that it’s a staple at fast-food restaurants in the Philippines, including American franchises like KFC and Wendy’s. The Philippines biggest fast-food chain, Jollibee, offers burgers, fried chicken and spaghetti under one roof, and lucky for me, there’s a bunch of them here in California.

Filipino spaghetti is sweeter than a traditional Italian spaghetti, usually from the addition of sugar or banana ketchup to the sauce. It’s other defining characteristic is hot dogs, which sounds weird to non-Pinoys, but it acts as a salty counterpoint to the sweet sauce. (I always knew there was a reason I was partial to Spaghetti O’s with Sliced Franks when I was a kid.)

Filipino Spaghetti

I generally freestyle my spaghetti, but I always start with a plain sauce (like canned Hunt’s or Del Monte) to use as a base since other ingredients are going to be added. A friend who makes her own excellent version of Filipino spaghetti swears by Prego. I prefer using sugar as a sweetener instead of banana ketchup since it’s something I always have on hand.

Categories
Anthony Bourdain Filipino musings TV

Bourdain Rocks the “Land of Lechon”

I called my mom about 5 minutes before No Reservations: Philippines was going to air in California, and instead of greeting me, she said, “Are you watching No Reservations?” It wasn’t airing in Hawaii, where I was on vacation, for two more hours, but I did call her to make sure she was watching.


You know Bourdain was in the real Philippines because it said BAWAL UMIHI DITO
(translation: don’t pee here) on every wall. :)

If the Pacquiao/De la Hoya fight was the Filipino equivalent of the Super Bowl, I think this block of television devoted to the cuisine of the Philippines might have been our NBA All-Star Game. Granted, 44 minutes isn’t nearly enough time to do justice to the diverse cuisine of the Philippines, but I thought the show did a good job highlighting some of the great things about the Mother Islands. Bourdain is also a self-described history nut, and he had a lot of great questions about the cultural and historical influences on the Philippines.

I’m not going to recap the whole episode, but it was nice to see Bourdain fall in love with sisig and lechon, and then later declare that the Philippines is No. 1 on his “Hierarchy of Pork” on his Travel Channel blog.

Categories
Anthony Bourdain Filipino TV

Philippines Tops Bourdain’s “Hierarchy of Pork”

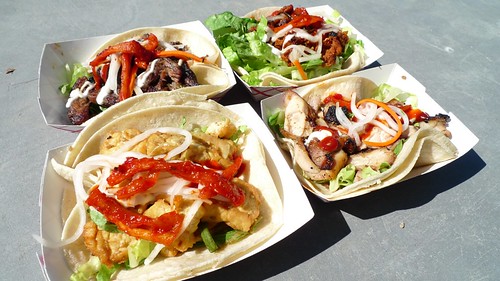
As the No Reservations – Philippines episode gets set to air, Bourdain’s latest blog post boldly declares that the Philippines is No. 1 in his so-called “Hierarchy of Pork,” ahead of Bali and Puerto Rico.
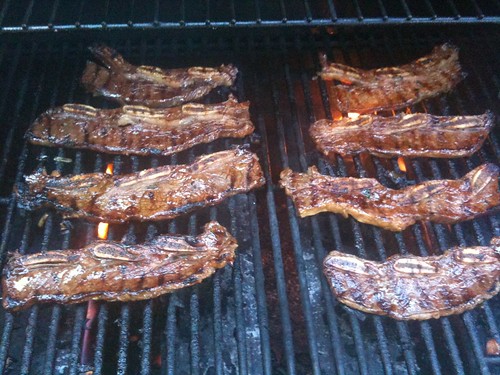
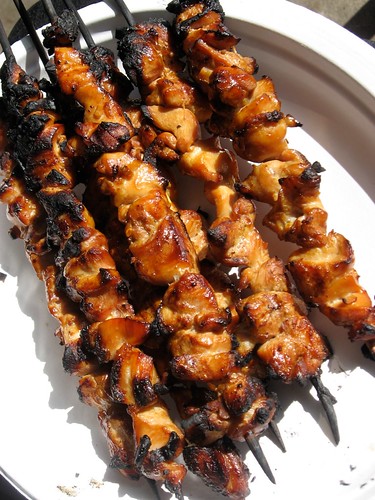
In his post, Bourdain had high praise for both sisig and the lechon he had in Cebu.

What we did get right, I’m quite sure, was making sure that the amazing, porky delights of “sisig” got plenty of camera time. If you’ve never had this divine mosaic of pig parts, chopped and served sizzling and crisp on one side on a screaming hot platter, then you’ve yet to have one of the world’s best beer drinking dishes. And speaking of pig? It can now be said that of all the whole roasted pigs I’ve had all over the world, the slow-roasted lechon I had on Cebu was the best.

First Manny Pacquiao and now No. 1 on Bourdain’s Hierarchy of Pork? All we need now is for Charice to become bigger than Celine Dion, and we can start our official cultural takeover of the world.

Categories
barbecue chicken Filipino

Filipino Barbecue Skewers

One of my most enduring food memories is grubbing on skewer after skewer of Filipino Barbecue, but it wasn’t until my friend asked me to cook for her son’s 2nd birthday yesterday that I even thought of making it myself.

Filipino BBQ Chicken SkewersChicken Skewers

Filipino Barbecue is usually made with pork or chicken. and the marinade is a combination of salty, sweet and citrus components. Many recipes call for 7-Up or Sprite, which works as a sweetener and tenderizer. I found a recipe that I liked and made some adjustments and additions to come up with this marinade. I’ll probably tweak this a bit more when I make it again, but here’s what I used yesterday.

Filipino Barbecue Marinade
1 cup soy sauce
1 head garlic, minced
1 onion, finely chopped
3 tablespoons of kalamansi juice or lemon juice
1 cup of lemon-lime soda
2 cups of tanglad (lemon grass) for whole chicken
1 teaspoon ground black pepper
1 teaspoon crushed red pepper.
3 tablespoons of brown or white sugar

This marinade works best with a 2-3 pounds of chicken or pork cut into cubes. If you use chicken, my preference is for thighs, but breast meat should work fine if you don’t like dark meat. It’s best to marinate the meat for only a couple hours instead of overnight, and then skewer the meat and grill it until it’s done.