Categories
Best of Inuyaki entertainment recipes Thomas Keller

Confit Byaldi (a.k.a. Ratatouille a la Remy)

In the movie Ratatouille, Pixar succeeded in making animated food almost as delectable as the real thing. By seeking the technical assistance of Thomas Keller, one of the world’s greatest and most meticulous chefs, Pixar gave the movie instant credibility to food lovers, critics and chefs around the world.


ratatouille

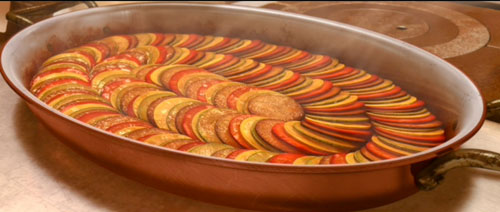
Remy the Rat’s ratatouille (above) is technically Keller’s interpretation of Confit Byaldi, a Turkish dish with the same flavor profile as ratatouille. We made the dish this weekend in preparation for Thanksgiving, and it’s definitely going on our menu. The recipe, originally published in the New York Times, follows the pictures.


[pictobrowser type=”flickr” userID=”arndog” albumID=”72157603116816185″]

INGREDIENTS
FOR PIPERADE

½ red pepper, seeds and ribs removed
½ yellow pepper, seeds and ribs removed
½ orange pepper, seeds and ribs removed
2 tablespoons extra virgin olive oil
1 teaspoon minced garlic
½ cup finely diced yellow onion
3 tomatoes (about 12oz. total weight), peeled, seeded, and finely diced, juices reserved
1 sprig thyme
1 sprig flat-leaf parsley
½ a bay leaf
Kosher salt

FOR VEGETABLES
1 zucchini (4 to 5 ounces) sliced in 116-inch rounds
1 Japanese eggplant, (4 to 5 ounces) sliced into 116-inch rounds
1 yellow squash (4 to 5 ounces) sliced into 116-inch rounds
4 Roma tomatoes, sliced into 116-inch rounds
½ teaspoon minced garlic
2 teaspoons olive oil
18 teaspoon thyme leaves
Kosher salt and freshly ground black pepper

FOR VINAIGRETTE
1 tablespoon extra virgin olive oil
1 teaspoon balsamic vinegar
Assorted fresh herbs (thyme flowers, chervil, thyme)
Kosher salt and freshly ground black pepper.

DIRECTIONS
1. For piperade, heat oven to 450F. Place pepper halves on a foil-lined sheet, cut side down. Roast until skin loosens, about 15 minutes. Remove from heat and let rest until cool enough to handle. Peel and chop finely.

2. Combine oil, garlic, and onion in medium skillet over low heat until very soft but not browned, about 8 minutes. Add tomatoes, their juices, thyme, parsley, and bay leaf. Simmer over low heat until very soft and very little liquid remains, about 10 minutes, do not brown; add peppers and simmer to soften them. Season to taste with salt, and discard herbs. Reserve tablespoon of mixture and spread remainder in bottom of an 8-inch skillet.

3. For vegetables, heat oven to 275F. Down center of pan, arrange a strip of 8 alternating slices of vegetables over piperade, overlapping so that ¼ inch of each slice is exposed. Around the center strip, overlap vegetables in a close spiral that lets slices mound slightly toward center. Repeat until pan is filled; all vegetables may not be needed.

4. Mix garlic, oil, and thyme leaves in bowl and season with salt and pepper to taste. Sprinkle over vegetables. Cover pan with foil and crimp edges to seal well. Bake until vegetables are tender when tested with a paring knife, about 2 hours. Uncover and bake for 30 minutes more. (Lightly cover with foil if it starts to brown.) If there is excess liquid in pan, place over medium heat on stove until reduced. (At this point it may be cooled, covered and refrigerated for up to 2 days. Serve cold or reheat in 350F oven until warm.)

5. For vinaigrette, combine reserved piperade, oil, vinegar, herbs, and salt and pepper to taste in a bowl.

6. To serve, heat broiler and place byaldi underneath until lightly browned. Slice in quarters and very carefully lift onto plate with offset spatula. Turn spatula 90 degrees, guiding byaldi into fan shape. Drizzle vinaigrette around plate. Serve hot.

Yield: 4 servings

Categories
Ad Hoc Best of Inuyaki chicken fried chicken recipes Thomas Keller

Ad Hoc Fried Chicken Recipe!

When I heard that Ad Hoc’s lemon-brined fried chicken recipe was in Food & Wine magazine, I got extremely excited. Normally, I wouldn’t go to the trouble of making this because I’d rather go to Ad Hoc (picture below) and spare myself the work, but I just had to see if I could pull this off.

Buttermilk Fried Chicken

Excerpt from Entertaining Napa Style in Food & Wine magazine:

To make this juicy and delectably crisp chicken, Thomas Keller soaks it in a lemony brine, then coats and fries it. The chicken, which is served every other Monday at Ad Hoc, is one of the most popular dishes at the restaurant. “Since Fried Chicken Night only happens twice a month,” Keller says, “people have a wonderful sense of anticipation.”

UPDATE (2/25/08)
I’ve had the chance to make this fried chicken a lot in the last few months and have basically finalized it for myself in the updated recipe below. I’ve included a sous vide step, an updated ingredient list and double dredging. If you want to see the original recipe, see the link to Food & Wine magazine above.

ACTIVE TIME: 1 HR 30 MIN
SERVES: 8

INGREDIENTS
16 chicken thighs and/or drumsticks (I prefer dark meat, substitute as desired)
Cooking oil for frying (peanut if you have it.)
Rosemary and thyme sprigs, for garnish

BRINE INGREDIENTS
1 gallon cold water
1 cup plus 2 teaspoons kosher salt
¼ cup plus 2 tablespoons honey
12 bay leaves
1 head of garlic, smashed but not peeled
2 tablespoons black peppercorns
3 large rosemary sprigs
1 small bunch of thyme
1 small bunch of parsley
Finely grated zest and juice of 2 lemons

DREDGE INGREDIENTS
3 cups all-purpose flour
2 tablespoons garlic powder
2 tablespoons onion powder
2 teaspoons cayenne pepper
2 teaspoons paprika
½ teaspoon ground pepper
2 teaspoons kosher salt
2 cups buttermilk

DIRECTIONS

  1. In a very large pot, combine 1 quart of the water with 1 cup of the salt and the honey, bay leaves, garlic, peppercorns, rosemary, thyme and parsley. Add the lemon zest and juice and the lemon halves and bring to a simmer over moderate heat, stirring until the salt is dissolved. Let cool completely, then stir in the remaining 3 quarts of cold water. Add the chickens, being sure they’re completely submerged, and refrigerate overnight.

    Lemony Brine
  2. Drain and rinse the chicken pieces and pat dry. Make sure the chicken is really dry and that you scrape off any herbs or peppercorns stuck to the skin.
  3. If you want to sous vide the chicken before frying, add two to three pieces of chicken to each Foodsaver bag, then vacuum and seal the bags. Place the chicken at 140F/60C water bath for at least 1 hour. Otherwise, skip to step 5.
  4. Remove the chicken pieces from the bag and pat dry with paper towels. Make sure chicken is very dry.
  5. In a large bowl, combine the flour, garlic powder, onion powder, cayenne, ground black pepper and the remaining 2 teaspoons of salt. Put the buttermilk in a large, shallow bowl. Working with a few pieces at a time, dip the chicken in the buttermilk, then dredge in the flour mixture, pressing so it adheres all over. Transfer the chicken to a baking sheet lined with wax paper or use a wire rack. Let sit for 20 minutes and then redredge the chicken in buttermilk and flour before frying.

    The Dredge
  6. In a very large pot or dutch oven, heat oil to 360F. Use enough oil to deep fry the chicken. If you want, you can also pan fry the chicken, as seen below. Fry the chicken in 2 or 3 batches until golden and crunchy and the internal temperature is 160F/60C (about 20 minutes).

    Note: If you cooked the chicken sous vide, you can really just trust your judgement and fry until you’re statisfied with the color of the crust since the chicken is already cooked.


    Turn the chicken once
  7. Transfer the chicken to cooling rack to drain, and keep warm in a low oven (175–200F) while you fry the remaining chicken pieces. Transfer the fried chicken to a platter, garnish with the herb sprigs and serve hot or at room temperature.

    Ad Hoc's Fried Chicken

SOUS VIDE NOTES

  • Cooking the chicken sous vide ensures that it’s moist and tender.
  • 140F/60C may seem like a low temp for the chicken (160F/71.1C is considered “safe”), but the internal temperature of the chicken will rise when it’s being fried.

GENERAL NOTES

  • Chicken should be at room temperature when you’re ready to cook.
  • You can add herbs (rosemary, thyme, etc.) to the oil as it’s heating to infuse it with flavor and then use the same herbs as a garnish.
  • This fried chicken is great the next day, cold and straight out of the refrigerator.
  • See comments below for more tips…some come straight from the source!
Categories
Best of Inuyaki dessert Filipino recipes

Mom’s Famous Leche Flan

Leche FlanI never thought I’d get permission to post this recipe, but here it is! My mom’s leche flan (literally milk custard) is famous in our hometown Filipino community. It’s the one thing people always expected or asked her to bring to parties. It’s thicker and denser than Mexican flan, which I always find bland and disappointing. I hope you enjoy it as much as I do.

INGREDIENTS
8 egg yolks
2 cups evaporated milk
1 tsp. lemon extract or lemon zest
1 cup sugar
Extra 1/4 to 1/2 cup of sugar to caramelize before adding the rest of the mixture

DIRECTIONS

  1. Preheat oven to 375 degrees.
  2. Place all ingredients in a bowl and use a hand or stand mixer to mix the custard together. To ensure the smoothness of the custard, you should strain the mixture while before pouring it into the baking dish or mold.
  3. Place extra sugar in a small pan and heat it over medium heat until the sugar melts and browns.
  4. Pour melted sugar into your baking pan or mold so it coats the bottom.
  5. Add custard mixture to your baking pan or mold on top of the carmelized sugar.
  6. Cover the baking pan or mold with foil and place it into a water bath (i.e. a bigger pan with about 1/2 inch of water in it). This is essential for cooking the leche flan properly.
  7. Bake at 375 for approximately an hour.
  8. Check with a toothpick or nudge the pan to see if the mixture is almost solid.
  9. Remove the foil and cook uncovered for 20 more minutes.
  10. Remove from oven and let cool on the counter. You can also refrigerate the leche flan after it reaches room temperature if you’re making this a day ahead of time.
  11. When you are ready to serve, run a knife around the edge of the pan to loosen the flan.
  12. Place a serving plate on top of the pan and invert it quickly. Be careful not to spill! When properly executed, the flan will be golden brown on top and yellowish on the bottom.
  13. Enjoy!
Categories
Best of Inuyaki dessert Filipino recipes

Bibingka (Philippine rice cake)

Here’s an easy recipe for bibingka. It’s the one my mom used to make and it’s an interesting mix of flavors.

INGREDIENTS
1 cup Japanese sweet rice flour (Mochiko is the preferred brand)
1 cup sugar (you can reduce this amount if you want)
1 cup evaporated milk or coconut milk
1/2 stick butter (at room temperature)
1 tbsp baking powder
5 eggs
Parmesan cheese or fresh grated coconut (optional)

DIRECTIONS

  1. Preheat oven to 350 degrees.
  2. Place all ingredients in a bowl and use a hand or stand mixer and mix thoroughly.
  3. Add mixture to a baking pan.
  4. Bake at 350 degrees for approximately 45 minutes. Insert a toothpick to see if the cake is done.
  5. If you want, sprinkle Parmesan cheese or grated coconut on top of the cake about 10 minutes before it’s finished cooking.
  6. Remove from oven and let it cool to room temperature before serving.
  7. Enjoy.
Categories
Best of Inuyaki entertainment Italian recipes

Timpáno alla Big Night

Recipe courtesy of Toni’s Garden.

Big Night DVDRemember the movie Big Night and that final climactic dinner scene? The centerpiece of the meal was the Timpani, which is basically a “drum” filled with layers of pasta, meat, sauce, eggs. My wife and I are big fans of the movie, and one day, when we were watching the movie again on cable, I said, hey, let’s make that!

After a little research, I found a couple recipes. One is actually from the family cookbook of Stanley Tucci, who played Segundo in the movie. (Tony Shaloub played his older brother Primo.) You can buy the cookbook at Amazon.com.

The other recipe I found is from the recipe collection at Toni’s Garden. I ended up using it because it was inspired by the Tucci family recipe, and the directions were more in depth. I also thought the Sunday Sauce recipe that accompanied it sounded delicious, and I wanted to try to make the sauce completely from scratch. I’m posting this recipe here so I can include some of the pictures we took while creating this incredible dish.

We’ve made Timpáno twice. The first time, it cost us $100 because we went out and bought top-of-the-line ingredients. The second time it only costs us around $50 because we used cheaper (but still good-quality) ingredients, and it tasted just as good. You’ll save yourself a lot of time if you buy some premade pizza dough, but if you’re adventurous and want to make it from scratch, the dough recipe is also here.

INGREDIENTS
The Dough
4 cups all-purpose flour
4 large eggs
1 teaspoon kosher salt
3 tablespoons olive oil
1/2 cup water
Butter and Olive Oil to prepare the pan

The Filling
2 cups 1/4 x 1/2-inch Genoa salami pieces (approx. 3/4 lb.)
2 cups 1/4 x 1/2-inch sharp provolone cheese pieces (approx. 3/4 lb.)
12 hard-boiled eggs, shelled, quartered lengthwise and then each quarter cut in half to create chunks.
2 cups little meatballs about 1″ diameter
8 cups Sunday Sauce following the note at the beginning of recipe.
3 pounds, ziti or penne, cooked very al dente (about half the time recommended on the package) and drained (18 cups cooked)
2/3 cup finely grated pecorino Romano cheese
4 large eggs, beaten

A Few Notes Before Starting
Make your sauce the day before. The meat that is not being used in the timpáno makes a great dinner the night before, along with a salad. Also, the sauce always tastes better the next day.

The dough for the timpáno is rolled into a 1/16″ thick round, the diameter which is determined by the size of your pan. Add together the diameter of the bottom and top of your pan, and double the height of the pan. The pan I used required a 30-inch diameter circle. I used an enamel basin similar to the one on the right. You can use almost any pan or bowl of similar shape.


Finally, read the recipe through a couple of times until you are familiar with the process. Although there are a lot of steps and preparation involved it is not a difficult recipe. Your experience will be less hectic if you take the time to prepare and measure all of your filling ingredients ahead of time. This is a great job for those guests that want to help! Enjoy!


Making the Dough
By hand

  1. Mix the flour and salt together on a clean , dry work surface or pastry board. Form into a mound and then make a well in the center.
  2. Break the eggs into the center of the well and lightly beat them with a fork. Stir in the olive oil and 3 tablespoons of the water.
  3. Use the fork to gradually incorporate some of the dry ingredients into the egg mixture.
  4. Continue mixing the dry ingredients into the eggs, adding the remaining water 1 tablespoon at a time.
  5. Knead the dough with your hands to make a well-mixed, smooth, dry dough. If the dough becomes to sticky, add more flour.
  6. Set aside to rest for 5-10 minutes, or refrigerate overnight.
  7. Bring to room temperature before rolling.

Using stand mixer

  1. Place all ingredients in the bowl except for the water.
  2. Turn the mixer on slowly and add 3 tablespoons of the water.
  3. Add more water, 1 tablespoon at a time, until the mixture comes together and forms a ball.
  4. Knead the dough on a lightly floured board to make sure it is well mixed.
  5. Set aside to rest for 5-10 minutes, or refrigerate overnight.
  6. Bring to room temperature before rolling.

Finishing the Dough

  1. Flatten out the dough on a lightly floured surface. Roll the dough to 1/16″ thickness, dusting with flour and turning from time to time, to prevent sticking.
  2. Generously grease the pan with butter and olive oil. Fold the dough in half and then in half again, to form a triangle, and place it in the pan.
  3. Open the dough and gently press it into the pan against the bottom and sides. Allow the extra dough to drape over the sides.

Cooking the Pasta
Cook the pasta in a very large pot of salted water until it is half done (it will finish cooking in the oven). place in a large bowl and toss with 2 cups of the sauce.

Preheat oven to 350F

Filling the Timpáno


  1. Make sure the salami, provolone, hard-boiled eggs, meatballs, and sauce are at room temperature.
  2. Begin layering the Timpáno by distributing 6 generous cups of the pasta on the bottom of the timpáno.
  3. Top with 1 cup of the salami, 1 cup of the provolone, 6 of the hard-boiled eggs, 1 cup of the meatballs, and 1/3 cup of the Romano cheese.
  4. Pour 2 cups of the sauce over these ingredients.
  5. Continue layering with 6 cups of the remaining pasta.
  6. Top with remaining 1 cup of salami, 1 cup provolone, 6 hard-boiled eggs, 1 cup of meatballs and 1/3 cup Romano cheese.
  7. Pour 2 cups of the sauce over these ingredients and top with remaining 6 cups of pasta. (The ingredients should now be about 1″ below the rim of the pan.)


  8. Pour the remaining 2 cups of sauce over the pasta.
  9. Pour the beaten eggs on top.
  10. Fold the pasta dough over the filling to seal completely. Trim away and discard any double layers of dough.


Cooking the Timpano

  1. Bake the timpáno until lightly browned, about 1 hour, then cover loosely with aluminum foil and continue baking until the timpáno is cooked through and the dough is golden brown, about 30 minutes. The internal temperature should reach 120F.


  2. Remove from oven and allow to rest for 30-40 minutes. The timpáno should not stick to the pan. If it does, carefully run a knife around the edges to loosen.
  3. Placing a serving platter or cutting board on top of the pan, and then quickly and with confidence, invert the timpáno onto a serving platter.
  4. Remove the pan and allow timpáno to cool another 20 minutes.
  5. Using a long, sharp knife, slice the timpáno as you would a pie into individual portions. Serves 16.


Categories
Best of Inuyaki dessert recipes

Sweet Potato Pie

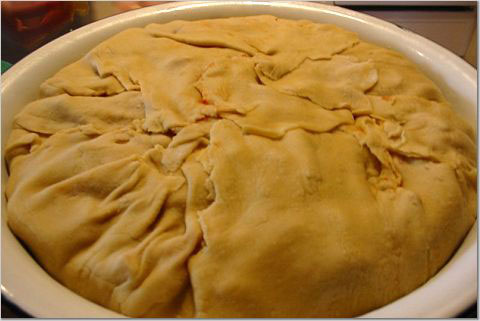
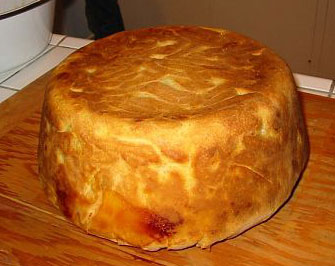
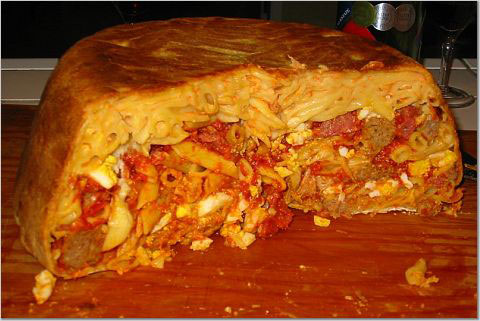
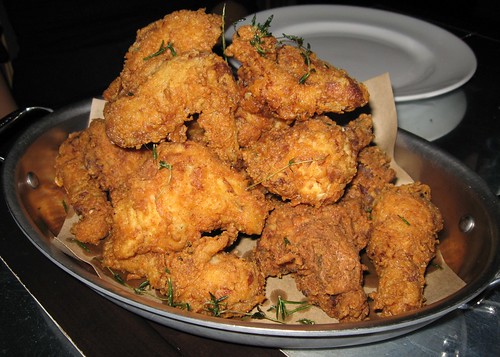
When I was in college, I had a sweet potato pie at Roscoe’s Chicken and Waffles that was so bad it compelled me to learn how to make my own. It was one of my first culinary epiphanies.

I’ve been using this sweet potato pie recipe for years. I found it on the Web a long time ago, so I’m not sure who I’m supposed to credit, but here it is:

INGREDIENTS
2 cups mashed sweet potatoes
3 eggs, beaten
1 cup evaporated milk
1 cup sugar
1 teaspoon ground cinnamon
1/2 teaspoon salt
1/2 teaspoon ground nutmeg
1/4 teaspoon ground cloves
1/4 teaspoon ground ginger
1 (9 inch) unbaked deep dish pie crust (Dough/crust and I don’t get along. Mrs. Smith’s is my favorite store brand)

DIRECTIONS

  1. Preheat oven to 350F (175C) and place the rack in the middle of the oven.
  2. In a medium bowl, mix the sweet potatoes, eggs, evaporated milk, cinnamon, nutmeg, cloves and salt. For a lighter, fluffier pie, assemble this mixture in a blender and give it whir for a minute or so to incorporate some air into the mixture.
  3. Pour the batter into the pie crust and place the pie directly on the oven rack.
  4. Bake for 50 minutes, or until a knife inserted in center comes out clean. Let the pie cool for a bit before serving.

For variety, you can top with 1 cup of toasted pecans and then drizzle the top of the pie with a little maple syrup before placing in oven.

(Picture courtesy of The Green Cutting Board.)